A travel photojournalist's kit on the cheap and light in 2019
 |
| Most of my gear on a plastic table. Đà Nẵng, Việt Nam. Don't buy this. image: ©Brian Beeler |
I started working as a photojournalist at 16, loved it and was good at it. It's not that I'm an excellent writer because I'm not. It's not because I'm an excellent photographer because I'm not. I'm not the guy you send out because you're an editor looking for someone to bring home the next, great moving story that will rock the world. I'm the guy you send out with an idea for a story and need about 1,200 words and three photos; establishing, context and close-up, in 72 hours without fail. Many years ago there was a photo editor at National Geographic that had a sign on his desk that read "At National Geographic we print photos, not excuses." While there are many better than me I was a photojournalist that would never fail no matter what; I always brought back a story and to me that's what makes for a good photojournalist.
Part of being a travel photojournalist is having the right tools. These days everyone travels with a laptop and camera. The latter for me are two Fujifilm X-T1 bodies and a bag full of lenses or my Fujifilm X100T when even the diminutive XT-1 is too much. My "bread and butter" lenses are Fujifilm's "Red Badge" XF 16-55mm f/2.8 and XF 50-140mm f/2.8. While they capture an excellent image they're massive lenses which was always uncomfortable especially when I found myself knee-deep in a rice paddy in Thailand or Vietnam on a 35c or more day. Also traveling through airport security in countries like China where those members of the free press seem to always warrant extra questioning. I don't recommend you use what I use and if I was building a kit today I'd definitely make different choices.
The question is do you need all that gear and if not then what? No and in fact I'd recommend carrying as little as possible. At the very most two bodies and three as small as possible lenses. If you can only carry one camera all the better. Everything should fit into what the airlines call a "personal item" bag which still allows one to also have a full-sized carry-on.
Let's put aside the new or used argument: unless someone else is buying the gear buy used. Cameras that are a few years old still take a great image and can be purchased in excellent condition for about half the original price. Buy from a reputable used dealer like KEH, B&H or Adorama as they will service said gear before selling it and offer a guarantee that the camera will arrive in working condition which you don't get from a private seller. Also there's a lot of stolen gear on auction sites which is always troublesome especially if you get caught with it. My preference for new gear is B&H and used gear KEH. While I've included links to both I don't receive any compensation from them. I just think they're great places to buy new and used gear.
My recommendations are what I like and works well for travel photojournalism. If YouTube is you're bread-and-butter than go out and pick up a used entry level Canon DSLR with two lenses: the EF-S 18-55mm f/3.5-5.6 IS and RF 35mm F1.8 Macro IS STM. Bang for the buck and image quality they're hard to beat. I love Fujifilm and the images it produces but those distinct images can be polarizing. An entry level Canon is like a 1970's Chevy pick-up: it always works. While I mostly shoot stills when I shot video for YouTube it was always on a well-worn Canon D70 and an IS lenses.
The cameras I recommend are mostly the same internally, all out of production and all still work great. So well even two iterations later I can't justify upgrading. While they are 16MP instead of the higher 24MP found on the newer models 16MP still works fine. For perspective film offers about 8MP and 16MP will print beautifully at A2 (16.5 x 23.4 inches) and even look nice at A1 (23.4 x 33.1 inches) thanks to Fujifilm's X-Trans II color array instead of the Bayer color array found on every other camera. The X-Trans II color array is designed to mimic the silver nitrate pattern found on film which gives a pleasing grain. This is also the reason why this color array is the bain of many video shooters. Again, these are not the cameras if most of your final product ends up on YouTube.
Fujifilm cameras have a couple other distinct advantages over Nikons and Canons which are still excellent. First are Fujifilm's "film simulations." Years ago when they first started to design the X-Series camera series Fujifilm's digital engineers sat down with Fujifilm's chemical engineers to make faithful digital reproductions of their films. The result are amazing JPEGs that require little editing, a bonus to photojournalists. While Lightroom and Photoshop are much more flexible they also require a lot of extra time and effort, something that's rarely a luxury to photojournalists. The second is that while Fujifilm lenses are just as good if not better than Nikon and Canon lenses they cost less. Fujifilm wants photographers to switch to them and bodies are relatively cheap compared to replacing a bag full of lenses.
I recommend shooting in RAW only, generating JPEGs in camera when you have the chance to think about what you want then downloading your images instead of shooting JPEGs as this will allow you to change a multitude of options like film simulation, dynamic range, highlights, shadows, white balance and more. It also preserves the original format for many years. While Adobe Lightroom supports Fujifilm's RAW format and film simulations the JPEGs created are simply not as good as what you create in camera.
"Classic Chrome" at ISO 1600 and an adjusted white balance of red +3 / blue -4 feels like Kodachrome K-14, "Monochrome" at ISO 1600 to 3200 feels like Kodak Plus-X and "Monochrome" at ISO 3200 to 6400 feels like Kodak Tri-X. No other camera I know of can do that.
Also learn how to use your flash as a few simple tricks can really make your images come alive.
How to Master Flash Photography for Location Lighting with National Geographic photographer Bob Krist
The myth that you need a super fast lens
I get it. You see a lens and it comes in f/2.8, f/2 and f/1.4. Maybe even f/.95 although that version might be equal to a year's worth of rent. The choice seems simple: if you can afford the faster lens get it. Not so fast because the faster lens might not be the best. First let me point out the obvious: faster lenses let in more light, allow for a better bokeh and cost a lot more. Now the less obvious: faster lenses are usually not the sharpest, are much harder to control, autofocus a bit slower and weigh a lot more than their slower brethren. A lot more. Unless you're absolutely sure you need that super fast lens stay above f/2.
Starting in the early 1960's Canon started making the fastest glass in town, the 50mm f/.95 "dream lens", and like the fastest automobiles it was very hard to control. Open all the way photographing a subject six feet away gave you a depth of field of only one inch. That means while the eyes will be in focus the nose and ears won't. And that "dream lens" is really soft. While that's fine for portraits is certainly not for much of anything else.
The "fastest lens in the West" started getting so out of hand with the Canon "dream lens" Zeiss soon created the Zeiss 40mm f/0.33 Super-Q-Gigantar as a joke. This was never a functioning lens and the "Q" was short for "Quatsch" meaning nonsense in German. They understood that fastest only meant more light but at a hefty price which was weight and sharpness.
Moral of the story: buy the lens that will offer a balance of sharpness, weight, price, size and bokeh. If you're not positive on what you need then it's best to stay above f/2 and my recommended lenses adhere to this rule. You're back and bank account will thank you.
Airport security and screening
So you got lucky and got a freelance travel photojournalism assignment. Good for you. While one in many places is required to get a press visa and permission that ain't going to happen. I was in the habit of traveling on tourist visas, shooting vacation photos that strangely matched the photo assignment then after returning home realized I could use said photos for work. Nudge-nudge wink-wink Bob's your uncle. The point is it's best to lay low, play nice and look like a tourist. The kit I'm recommending looks a lot less professional and won't arouse attention like a pair of f/2.8 zoom lenses. While that press vest looks cool it's more likely to cause you problems. This should go without saying but don't be carrying anything that your mother wouldn't approve of. Also let me state the obvious: stick to travel related assignments and above all else avoid the politics.
Let's put aside the new or used argument: unless someone else is buying the gear buy used. Cameras that are a few years old still take a great image and can be purchased in excellent condition for about half the original price. Buy from a reputable used dealer like KEH, B&H or Adorama as they will service said gear before selling it and offer a guarantee that the camera will arrive in working condition which you don't get from a private seller. Also there's a lot of stolen gear on auction sites which is always troublesome especially if you get caught with it. My preference for new gear is B&H and used gear KEH. While I've included links to both I don't receive any compensation from them. I just think they're great places to buy new and used gear.
My recommendations are what I like and works well for travel photojournalism. If YouTube is you're bread-and-butter than go out and pick up a used entry level Canon DSLR with two lenses: the EF-S 18-55mm f/3.5-5.6 IS and RF 35mm F1.8 Macro IS STM. Bang for the buck and image quality they're hard to beat. I love Fujifilm and the images it produces but those distinct images can be polarizing. An entry level Canon is like a 1970's Chevy pick-up: it always works. While I mostly shoot stills when I shot video for YouTube it was always on a well-worn Canon D70 and an IS lenses.
The cameras I recommend are mostly the same internally, all out of production and all still work great. So well even two iterations later I can't justify upgrading. While they are 16MP instead of the higher 24MP found on the newer models 16MP still works fine. For perspective film offers about 8MP and 16MP will print beautifully at A2 (16.5 x 23.4 inches) and even look nice at A1 (23.4 x 33.1 inches) thanks to Fujifilm's X-Trans II color array instead of the Bayer color array found on every other camera. The X-Trans II color array is designed to mimic the silver nitrate pattern found on film which gives a pleasing grain. This is also the reason why this color array is the bain of many video shooters. Again, these are not the cameras if most of your final product ends up on YouTube.
Fujifilm cameras have a couple other distinct advantages over Nikons and Canons which are still excellent. First are Fujifilm's "film simulations." Years ago when they first started to design the X-Series camera series Fujifilm's digital engineers sat down with Fujifilm's chemical engineers to make faithful digital reproductions of their films. The result are amazing JPEGs that require little editing, a bonus to photojournalists. While Lightroom and Photoshop are much more flexible they also require a lot of extra time and effort, something that's rarely a luxury to photojournalists. The second is that while Fujifilm lenses are just as good if not better than Nikon and Canon lenses they cost less. Fujifilm wants photographers to switch to them and bodies are relatively cheap compared to replacing a bag full of lenses.
I recommend shooting in RAW only, generating JPEGs in camera when you have the chance to think about what you want then downloading your images instead of shooting JPEGs as this will allow you to change a multitude of options like film simulation, dynamic range, highlights, shadows, white balance and more. It also preserves the original format for many years. While Adobe Lightroom supports Fujifilm's RAW format and film simulations the JPEGs created are simply not as good as what you create in camera.
Shooting tips
The X-Trans II color array with its silver nitrate look allows you to really capture the feel of film. While Nikon and Canon photographers will scoff at these settings I shoot at ISO 800 to 6400 with a dynamic range of 400%. Where they scorn digital noise Fujifilm photographers welcome it. If you need more than ISO 6400 stick to ISO 6400 and set your EV to -1 or more and push the ISO up in the in-camera RAW to JPEG conversion. While these cameras support ISO 12600 and 25600 it will only record JPEGs and not RAW."Classic Chrome" at ISO 1600 and an adjusted white balance of red +3 / blue -4 feels like Kodachrome K-14, "Monochrome" at ISO 1600 to 3200 feels like Kodak Plus-X and "Monochrome" at ISO 3200 to 6400 feels like Kodak Tri-X. No other camera I know of can do that.
Also learn how to use your flash as a few simple tricks can really make your images come alive.
How to Master Flash Photography for Location Lighting with National Geographic photographer Bob Krist
The myth that you need a super fast lens
I get it. You see a lens and it comes in f/2.8, f/2 and f/1.4. Maybe even f/.95 although that version might be equal to a year's worth of rent. The choice seems simple: if you can afford the faster lens get it. Not so fast because the faster lens might not be the best. First let me point out the obvious: faster lenses let in more light, allow for a better bokeh and cost a lot more. Now the less obvious: faster lenses are usually not the sharpest, are much harder to control, autofocus a bit slower and weigh a lot more than their slower brethren. A lot more. Unless you're absolutely sure you need that super fast lens stay above f/2.
 |
| Canon 50mm f/.95 lens aka the "dream lens". image: wikicommons |
 |
| Zeiss 40mm f/0.33 Super-Q-Gigantar. image: wikicommons |
The "fastest lens in the West" started getting so out of hand with the Canon "dream lens" Zeiss soon created the Zeiss 40mm f/0.33 Super-Q-Gigantar as a joke. This was never a functioning lens and the "Q" was short for "Quatsch" meaning nonsense in German. They understood that fastest only meant more light but at a hefty price which was weight and sharpness.
Moral of the story: buy the lens that will offer a balance of sharpness, weight, price, size and bokeh. If you're not positive on what you need then it's best to stay above f/2 and my recommended lenses adhere to this rule. You're back and bank account will thank you.
Airport security and screening
So you got lucky and got a freelance travel photojournalism assignment. Good for you. While one in many places is required to get a press visa and permission that ain't going to happen. I was in the habit of traveling on tourist visas, shooting vacation photos that strangely matched the photo assignment then after returning home realized I could use said photos for work. Nudge-nudge wink-wink Bob's your uncle. The point is it's best to lay low, play nice and look like a tourist. The kit I'm recommending looks a lot less professional and won't arouse attention like a pair of f/2.8 zoom lenses. While that press vest looks cool it's more likely to cause you problems. This should go without saying but don't be carrying anything that your mother wouldn't approve of. Also let me state the obvious: stick to travel related assignments and above all else avoid the politics.
One last thing
The best camera you own is the one you are carrying on you right now. A box full of gear sitting at home does you no good. The kit I'm recommending is easy to carry and use everywhere. Before you travel practice, practice, practice. Take your kit for long walks in your home city and a local forest every day. Try different scenarios and practice with as many different settings as possible. Set a goal of posting one photo every day to your prefered social media site or blog so when you do travel using your camera will feel like second nature. While Facebook and Instagram might be your first choice I found the pressure to get "likes" more of a hindrance than a benefit since my main goal was just to have a place to practice my trade and didn't care if anyone read what I posted. Also both really compress images way too much to save them a bit of space and bandwidth, something less of an issue on other sites. The free Wordpress site is nice but it comes at the price of allowing them to slap banner ads on your content. Google's Blogger site, like I use, is free from both fees and advertisements, uses your Google ID for authentication which means one less password to remember and offers a nice creator and reader interface on both the desktop and mobile environments. One last tip: practice writing a paragraph or two about the photo you're posting as this will add context and value to your image.
The best camera you own is the one you are carrying on you right now. A box full of gear sitting at home does you no good. The kit I'm recommending is easy to carry and use everywhere. Before you travel practice, practice, practice. Take your kit for long walks in your home city and a local forest every day. Try different scenarios and practice with as many different settings as possible. Set a goal of posting one photo every day to your prefered social media site or blog so when you do travel using your camera will feel like second nature. While Facebook and Instagram might be your first choice I found the pressure to get "likes" more of a hindrance than a benefit since my main goal was just to have a place to practice my trade and didn't care if anyone read what I posted. Also both really compress images way too much to save them a bit of space and bandwidth, something less of an issue on other sites. The free Wordpress site is nice but it comes at the price of allowing them to slap banner ads on your content. Google's Blogger site, like I use, is free from both fees and advertisements, uses your Google ID for authentication which means one less password to remember and offers a nice creator and reader interface on both the desktop and mobile environments. One last tip: practice writing a paragraph or two about the photo you're posting as this will add context and value to your image.
 |
| Fishing boat moored in the East Vietnamese Sea in Velvia, Đà Nẵng, Việt Nam. Fujifilm X-T1. image: ©Brian Beeler |
 |
| Local villager in Velvia. Quảng Trị Province, Việt Nam. Fujifilm X-T1. image: ©Brian Beeler |

| Chùa Bửu Đài Sơn in Velvia. Thọ Quang, Đà Nẵng, Việt Nam. Fujifilm X-T1. image: ©Brian Beeler |
My recommended travel kit
Two Fujifilm X-T1 bodies, one Fujifilm X100T, XF 18-135mm zoom, 60mm prime, 18mm prime Lowepro Sling III bag
Two camera bodies allow you to quickly switch between lenses while traveling and it's very good to have a backup as traveling is hard on gear. If you can't afford three lenses I'd drop the 60mm as it's not weather sealed. Keep the 18mm prime for discrete photos with a touch of bokeh and the 18-135mm zoom for everything else including bad weather.
 |
| Fujifilm X-T1 body. image: KEH |
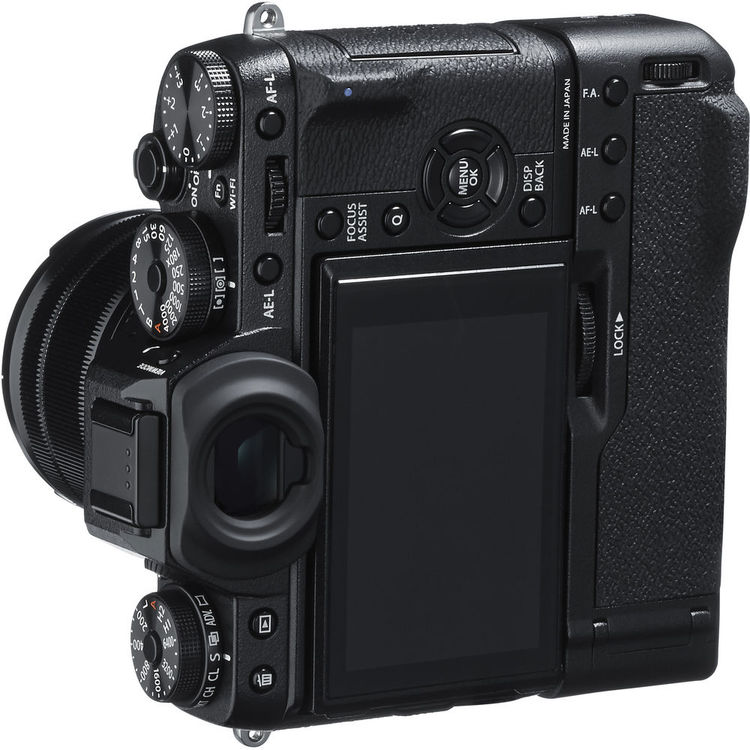
Fujifilm X-T1 body
The Fujifilm X-T1 was the first in this series and is still great. Putting aside it's classic look with a nod to the Contax RTS film camera and old-style knobs that work very well this is a very modern camera that will appeal to film photographers. Where almost everyone else uses a single mode selector wheel on the top Fujifilm cameras have real shutter speed, ISO and EV dials on the top and most of the lenses have a f/stop ring. It's more like using a film camera and less like playing a video game. The X-T1 has a flip down screen which allows for excellent shots from the waist like the old twin-lens reflex cameras. In the end all this allows the photographer to use motor memory to adjust settings and not always thinking about what's in the EVF.
My only minor complaint is with the external EF-X8 flash unit included with the X-T1 that sometimes fails but this is not the fault of the camera. If it does I'd recommend the very reasonably priced Bolt VC-310F flash which is tiny, supports TTL and does a much better job.
Fujifilm X-T1 Hands-on Review (Kai Man Wong)
Fujifilm X-T1 Review (Ken Rockwell)
Fujifilm X-T1 body, black (KEH)
Bolt VC-310F Compact On-Camera TTL Flash for Fujifilm Cameras (B&H)
 |
| Fujinon XF 18-135mm lens. image: KEH |
Fujinon XF 18-135mm f/3.5-5.6 R LM OIS WR lens (24mm-200mm)
Here's your default lens that's a Swiss Army knife. Wide angle, telephoto and OIS all in one. Not ideal in low light like it's f/2.8 brethren but still takes a great image and won't break the bank. Like the X-T1 is weather sealed so you're safe in a light rain. If you put the lens on in a dry environment and keep it on you won't get a lens fog which can happen on non weather sealed lenses. It can be a tad soft on full zoom but a quick post sharpening cleans it up nicely. The OIS is good for four stops allowing for a 1/15sec while wide open. While at 18mm wide open is f/3.5 it creeps up pretty quickly when you zoom. You won't get much of a bokeh with this lens but that's why you're carrying the 60mm lens I'm recommending.
Fujinon XF 18-135mm f/3.5-5.6 R LM OIS WR lens (KEH)
 |
| Fujinon XF 16-80mm f/4 lens. image: B&H |
Instead of the Fujinon XF 18-135mm f/3.5-5.6 I would also consider the Fujinon XF 16-80mm f/4 R OIS WR (24-120mm). The trade-off is simple: a lower and constant f/stop for a shorter zoom range. Having that extra 120mm-200mm range is more useful for taking pictures of birds and far off objects but this lens is better as an all-around street photographer's lens as it captures more light and can produce more bokeh. In a pinch if I could only have one body and one lens this would be the lens. Like the 18-135mm it also has image stabilization but to five stops instead of four. Unlike the 18-135mm it has an f/stop ring which is always welcomed. As it has just recently been released finding one on the second hand market will be difficult.
Fujinon XF 16-80mm f/4 R R OIS WR lens (B&H)
 |
| Fujinon XF 60mm lens. image: KEH |
Fujinon XF 60mm f/2.4 R Macro lens (90mm)
This might be the most disliked Fujifilm lens in the lineup and I love it because of its tiny size, low cost, low f/stop and long reach which makes it great for travel portraits and discreet street photography. Are the other Fujifilm portrait lenses better? Sure but they're much bigger and cost and weigh a lot more. This little guy works great when you need to be discreet but still have a telephoto lens. I've shot some of my best portraits with it. A macro focus range is the icing on the cake. Remember what I said about super fast lenses? Fujifilm makes a very nice 56mm f/1.2 lens but it weighs twice as much, a bit bigger and costs an extra 30% or about $350. While a very nice lens at f/2.4 you can't see a difference between the two. Save your money and get this 60mm f/2.4 which at f/2.4 still produces a very creamy bokeh.
Fujinon XF 60mm f/2.4 R Macro lens (KEH)
 |
| Fujinon XF 18mm lens. image: KEH |
Fujinon XF 18mm f/2 R lens (27mm)
This is the smallest and most discreet lens in the group. When you're hustling through a morning market in Central Vietnam at 5am the last thing you want to do is attract attention to yourself. The X-T1 and this lens are barely noticeable allowing you to catch an image discreetly whereas a DSLR with a monster f/2.8 will be noticed causing a loss of cander.
Fujinon XF 18mm f/2 R lens (KEH)
 |
| Fujifilm Vertical Battery Grip VG-XT1. image: B&H |
While not required the vertical battery grip adds a second battery and controls for when you're shooting vertically. Battery life is good on the X-T1 but an extra battery is sometimes needed to make it through the day if you spend some time reviewing your photos. Nice on at least one body.
Fujifilm Vertical Battery Grip VG-XT1 (KEH)
 |
| Lowepro Sling III, black. image: B&H |
 |
| ApeCase Cubeze 37 insert. image: B&H |
 | |
|
Lowepro Sling III bag with ApeCase Cubeze 37 insert
I went through a lot of bags to find the best balance of use, size and durability and this is it. The Lowepro Sling III bag counts as a "personal item" bag on flights when the back is zipped-up so you can still have a full-sized carry-on and after clearing security can unzip the back and have enough room to store a light raincoat. The heavy strap offers security on rough roads and in crowded markets where thin strapped bags can be more easily ripped and cut. The ApeCase Cubeze 37 insert allows for orderly storage and the drawstring offers extra weather protection, something I'm thankful for after more than once being caught in a few torrential rains. I've carried mine everywhere I've gone from rice paddies in Vietnam to the streets of Hong Kong to taro root farms in Central Thailand and it never let me down. Price wise it's pretty low.
Lowepro Passport Sling III, black (B&H)
Ape Case Cubeze QB37 Flexible Storage Cube, yellow (B&H)
 |
| Plum Village Thailand in Velvia. Fujifilm X100T. image: ©Brian Beeler |
 | |
|
 |
| Bún bò Huế at Quán Thảo in Velvia. Dương Trí Trạch, An Hải Bắc, Đà Nẵng, Việt Nam. Fujifilm X100T. image: ©Brian Beeler |
My "one camera to rule them all"
 | |
|
Fujifilm X100T
Let me just say I love this camera and if I'm not carrying around an X-T1 this is by my side. If I could only carry one camera with me for the rest of my life this would be it. With looks that harken back to classic Konica Hexar the X100T has an amazing lens which was inspired by the iconic 1957 Nikon W-NIKKOR C 35mm f/1.8 lens and is sharp across the f/stop range where only f/2 is not perfect but that's to be expected with any lens. Where Leicas are manual focus this has a fast autofocus system with facial recognition. The hybrid optical viewfinder allows one to either see a scene directly, indirectly via a beautiful LCD or a hybrid of direct sight and a small preview in the bottom right corner. The film simulations and excellent JPEGs allow for first class straight out of the camera shots that need little to no editing other than possible cropping. The lens is similar to a 35mm prime on a full frame camera and you zoom with your feet. The X100T feels like very few cameras do; it feels like a camera and not a video game.
While the original X100 and X100s are still very good cameras the original X100 uses a Bayer color array and the X100s is only a little less expensive than the X100T. Also both the X100 and X100s lack some major software improvements and features like the "Classic Chrome" film simulation.
My X100T has a minor modification. The 49mm filter screw on the lens is reversed and while you can mount a clear UV filter on the lens it will interfere with focus so I created a spacer ring from an old UV filter after removing the glass. The added bonus was that I was able to remount the retro silver ring on top. While you can use Fujifilm's filter adapter it takes away from the camera's aesthetics. This setup also offers some protection from lens flare.
The X100T can be a hard camera to find because most owners still use them and like me see little reason to upgrade but it's worth the wait. If you email KEH they might be able to put you on a waiting list.
Fujifilm X100T Hands-on Review (Kai Man Wong)
Fujifilm X100T Review (Ken Rockwell)
Fujifilm X100T, Silver (KEH)
Fujifilm X100T, Black (KEH)
 |
| Fujifilm X70. image: KEH |
Instead of the X100T you could opt for the Fujifilm X70 which is basically the same camera as the X100T but with a slightly wider angle lens, no OVF (optical viewfinder), touchscreen and smaller size. The biggest trade-off is the lack of an OVF but unlike the X100T the X70 will fit in your pocket. While its replacement, the XF10, is less expensive it's also less of a camera with the use of a Bayer color array instead of the X-Trans version. With the addition of a touchscreen on the X70 focus and options are more easily selected than the X100T. If you get a X70 I'm sure you'll be happy with your choice.
Fujifilm X70 Review (Ken Rockwell)
"5 Reasons to Buy a Fujifilm X70" (Mattias Burling)Fujifilm X70, Black (KEH)
Laptop
 |
| ASUS Chromebook Flip C101PA. image: Asus |
Other gear
 |
| Joby GorillaPod 3K Flexible Mini-Tripod image: B&H |
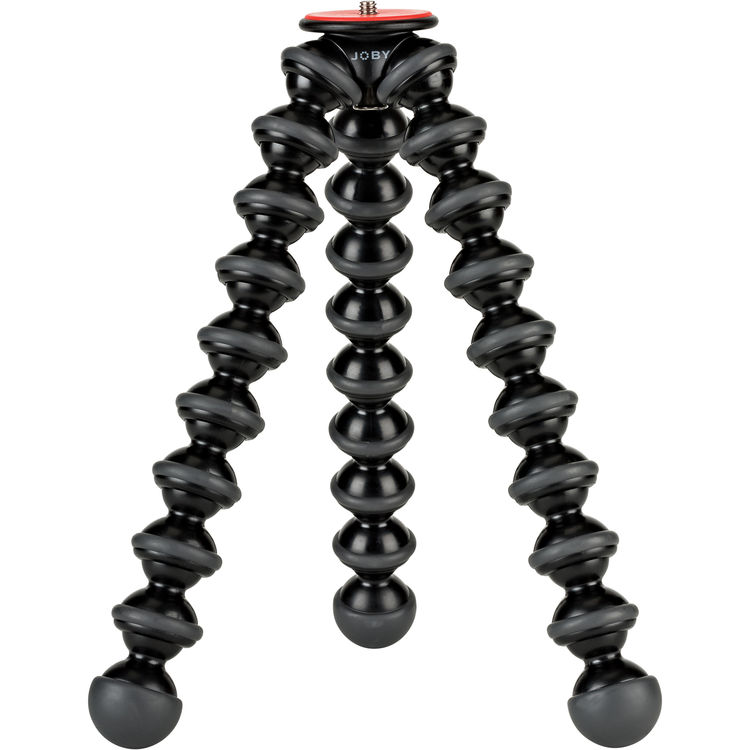
Tripod
A small flexible tripod like the JOBY GorillaPod can open up a world of possibilities for timelapse and long exposure photography and fits very well into the back of the Lowepro Sling III bag when the back is unzipped. While not required I found that it allowed me to capture low light images I would've otherwise missed. The flexible legs also lends itself well for wrapping around railings.
Joby GorillaPod 3K Flexible Mini-Tripod (B&H)
Filters
Neutral density filters allow you to turn moving water silky smooth and remove people from landscapes adding a very different dimension to your images. Definitely worth exploring but not required.
 | |
|


